This article provides a step-by-step guide to creating and maintaining a prompts database in Notion. By building this system, you'll be able to easily capture useful prompts you find online, organize them effectively, and access them when needed—ultimately saving hours each week and developing a sustainable habit of using AI in your daily work.
The most effective AI users build systems that make prompting frictionless - They create workflows that encourage regular AI tool usage, regardless of their technical background.
A well-organized prompts database reduces friction - By categorizing prompts by use case, output format, and relevance to different areas of your life, you can quickly find the right prompt when you need it.
Regular maintenance is key - Set aside time during weekly review sessions to test captured prompts, add relevant tags, and refine them for better results.
Benefits of Using a Prompts Database
Implementing a prompts database offers numerous advantages:
Increased productivity: Quick access to pre-written prompts saves time and effort in crafting new ones for recurring tasks.
Consistent AI usage: Reducing the friction of prompt creation encourages regular use of AI tools, helping you develop a habit of leveraging AI in your daily work.
Enhanced creativity: Experimenting with different prompts can spark new ideas and innovative solutions.
Continuous learning: As AI technology evolves, a prompts database provides a framework for updating and refining prompts based on new developments and best practices.
Setting Up Your Prompts Database in Notion
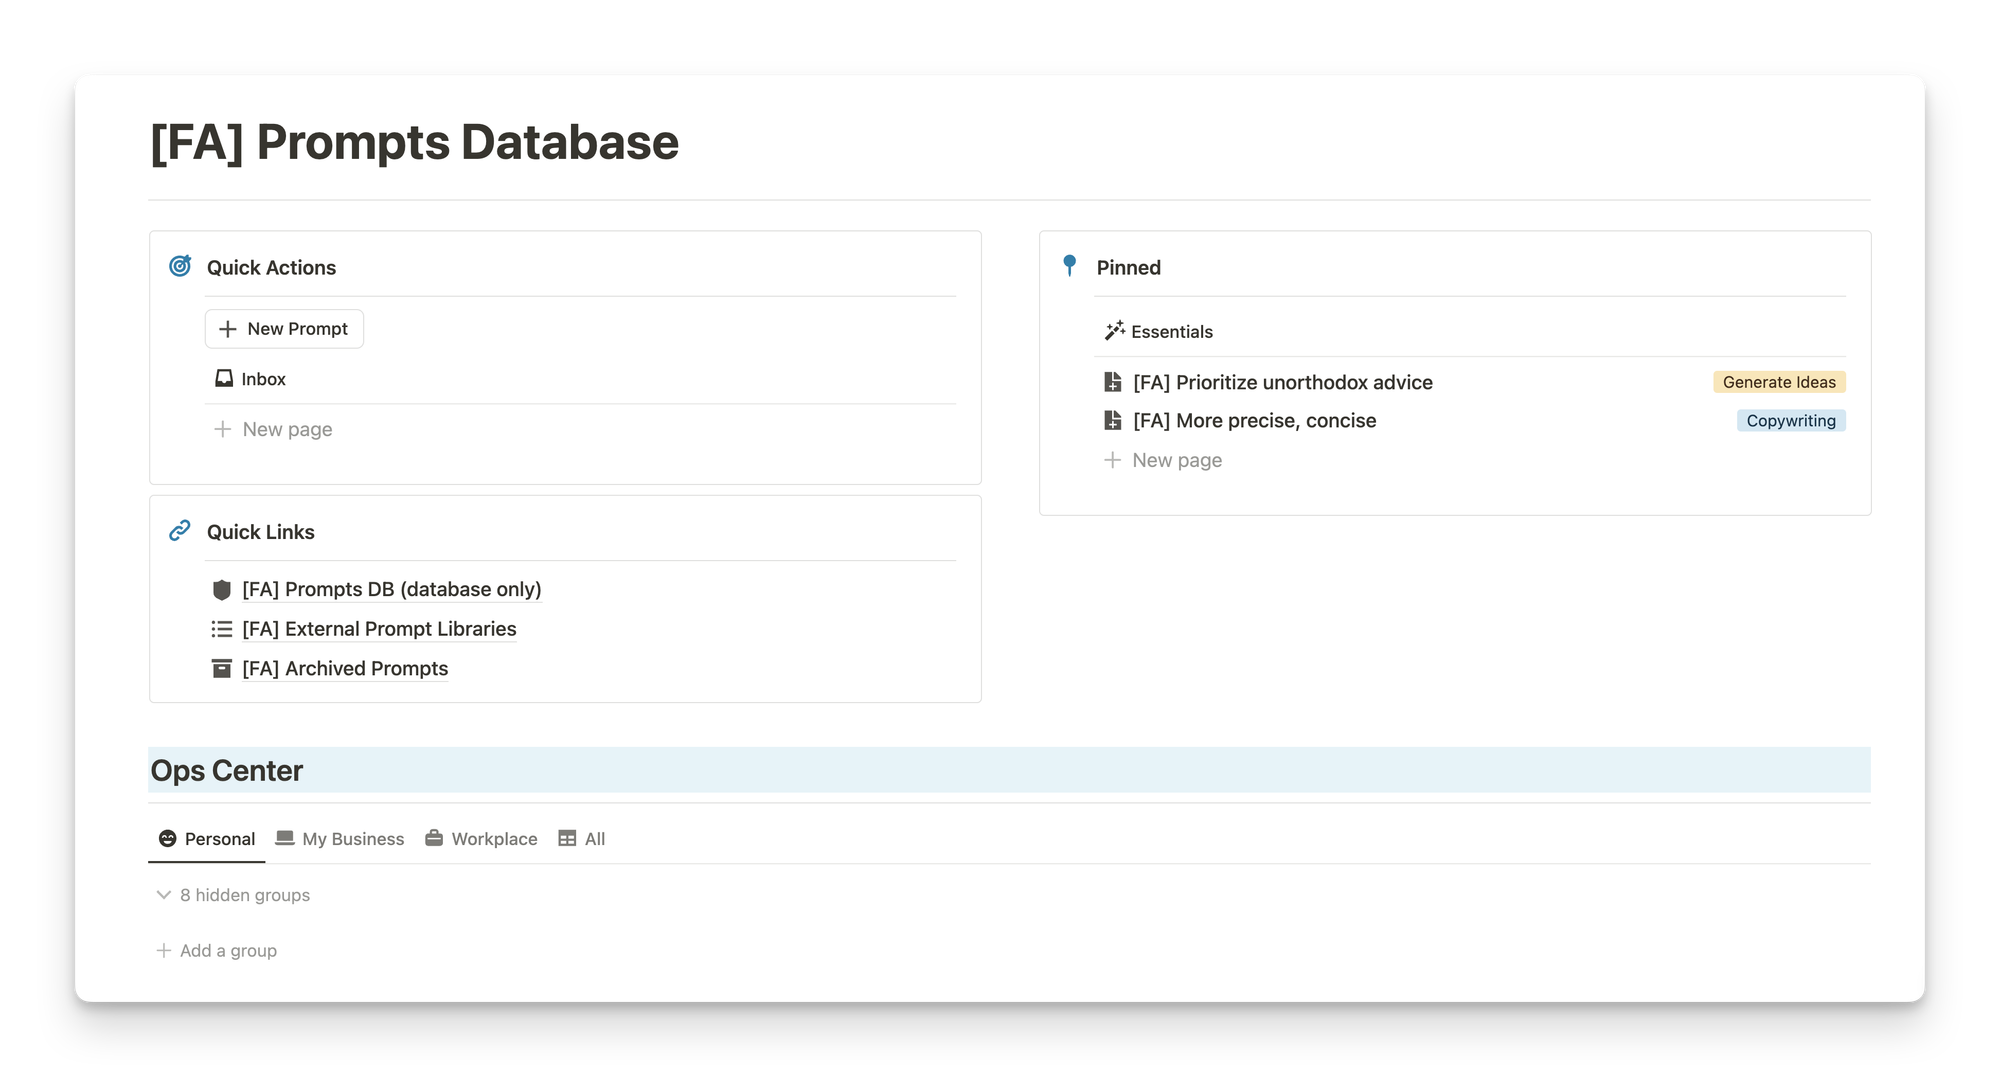
Creating the Basic Structure
Start with the template linked in the resources section
Click below the Quick Links section and type "/callout" to create a callout box
Name it "Quick Actions" and make it bold
Create a line and change the icon to a target
Move this above the Quick Links box
Duplicate it (CMD/CTRL + D)
Move the duplicate to the right and rename it to "Pinned"
Change the icon to a pushpin
Move the Quick Links box below Quick Actions
Creating the Operations Center
Create a Header 2 by typing "##" and name it "Ops Center"
Add a blue divider line
Under Quick Actions, create a button by typing "/button"
Add a plus icon
Under "New Action," select "Add page to" and choose the "Prompts DB (database only)"
Configure to automatically set the "Type" property to "Captured"
Set the button to open the new page in side peek view
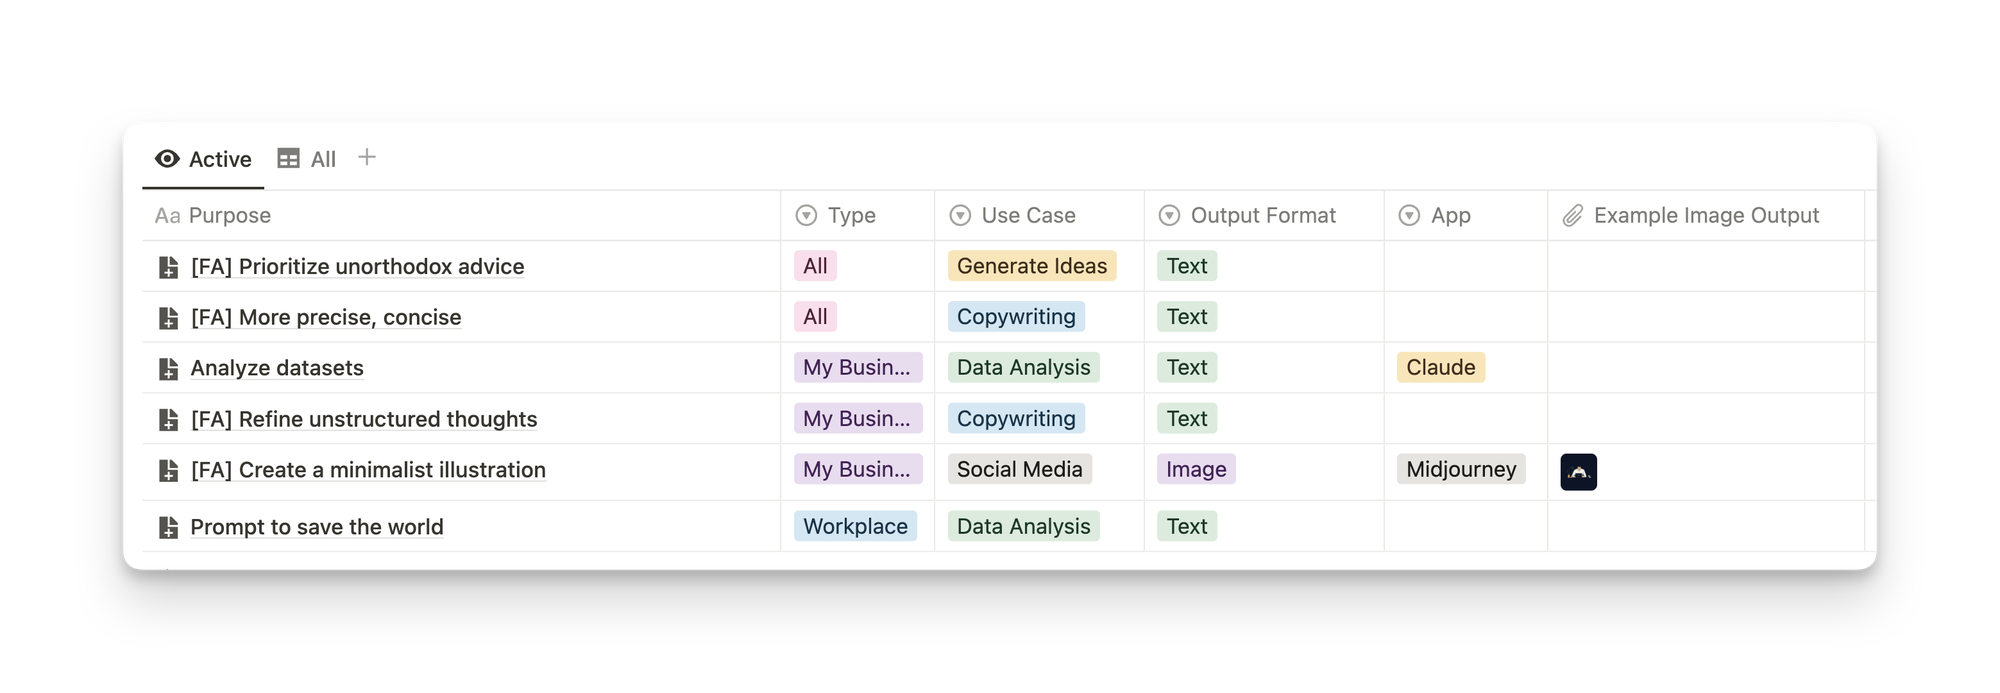
Understanding Database Properties
The database includes several key properties to help organize your prompts:
Type: Categorizes prompts by relevance (Personal, Business, Workplace, All, or Captured)
Use Case: Tags the prompt with the category of task (copywriting, business operations, data analysis, etc.)
Output Format: Indicates whether the result is text, image, or video
App: Notes which specific AI application the prompt works best with
Example Image Output: Shows sample results for image prompts
Last Edited Time and Created Time: Helps with sorting and tracking
Adding Views to the Main Page
Creating an Inbox View
Add a table view linked to the raw prompts database
Change to List layout
Toggle off the database title
Show only the "Type" property
Filter for Type = Captured only
Rename to "Inbox" with a tray icon
Creating an Essentials View
Copy the Inbox view to the Pinned box
Rename to "Essentials"
Show only the Use Case property
Change filter to Type = All
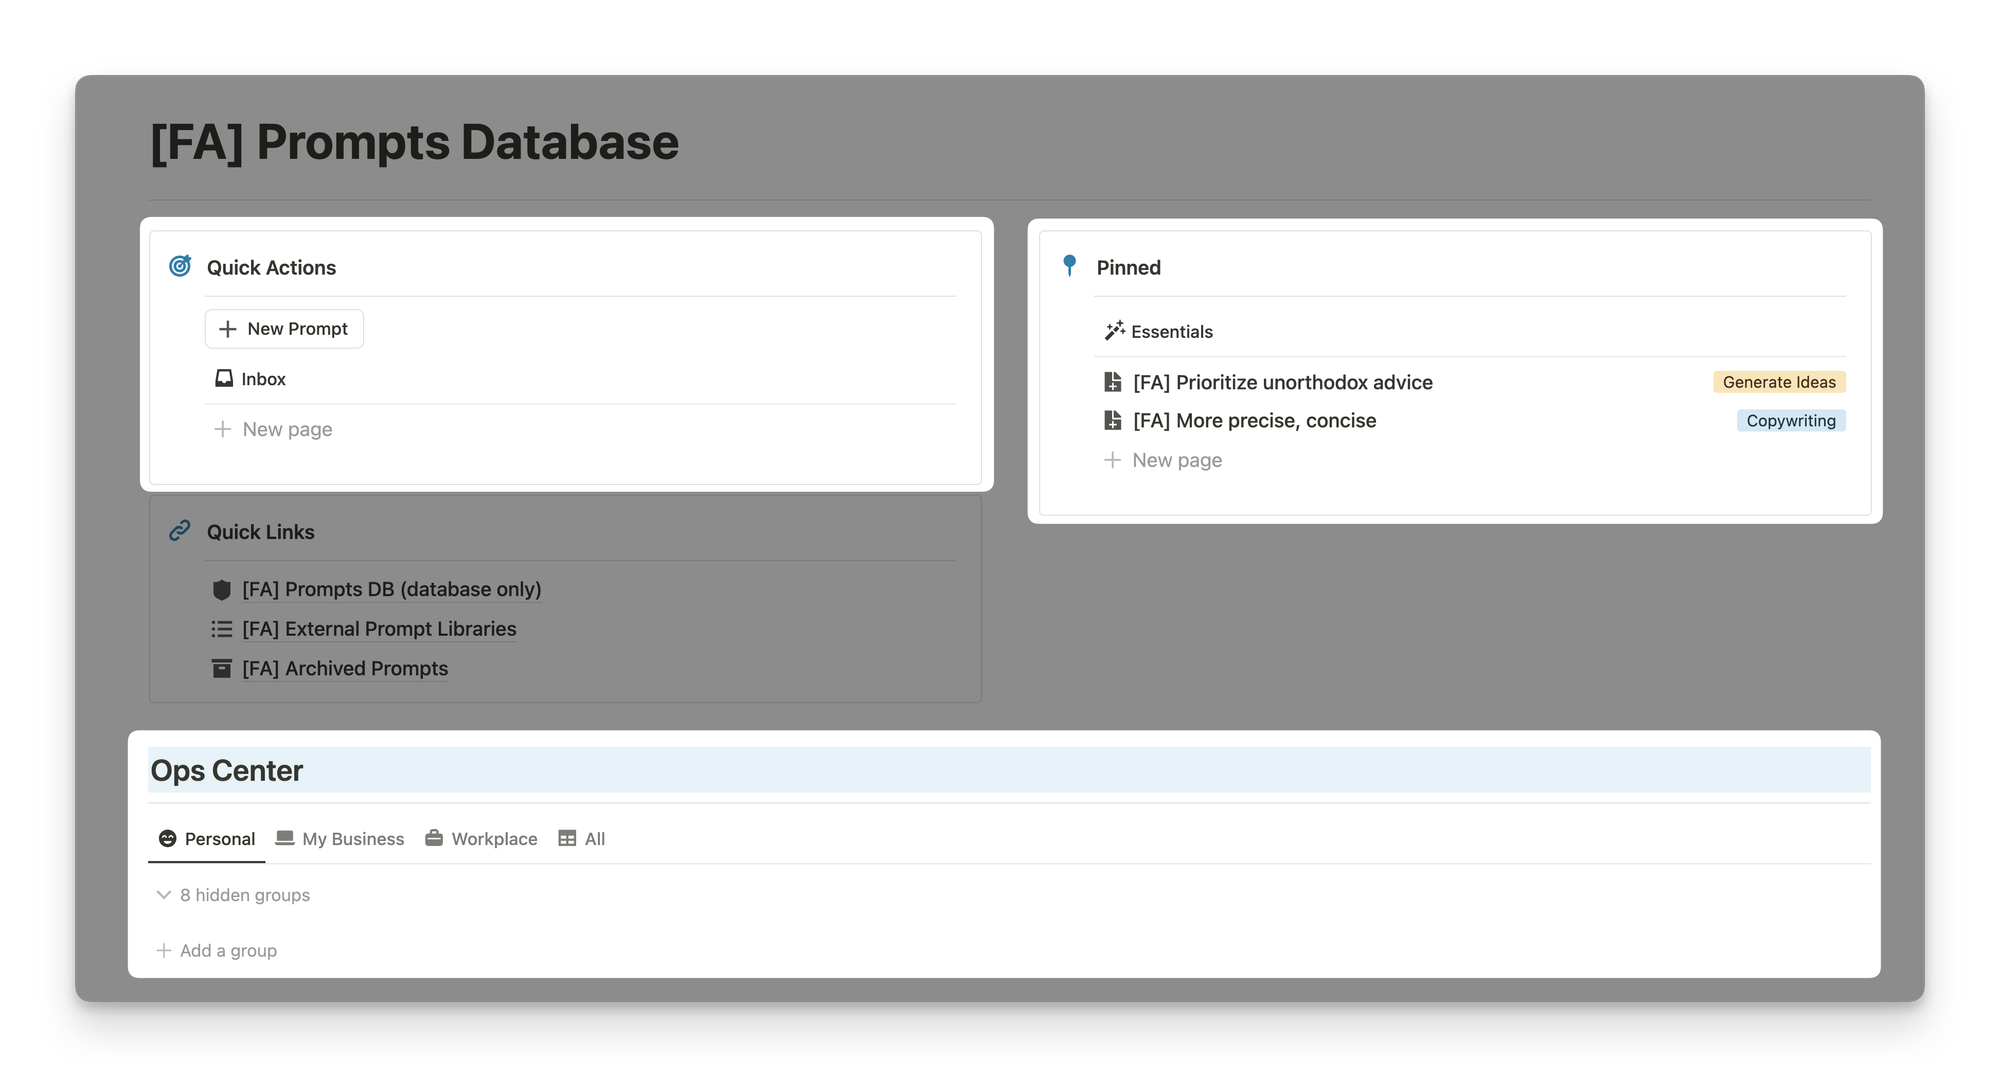
Setting Up the Operations Center Views
Create a table view linked to the raw Prompts database
Hide properties and table title
Create a "Personal" view with gallery layout
Show only the App property
Filter for Type = Personal
Group by Use Case
Duplicate and create similar views for other types (Business, etc.)
Using Your Prompts Database in Real Life
Capturing New Prompts
When you come across a useful prompt:
Copy the prompt text
Click your New Prompt button
Name the prompt
It's automatically tagged as "Captured"
Add a Use Case and Output Format
Paste the prompt in the body
Note the source if applicable
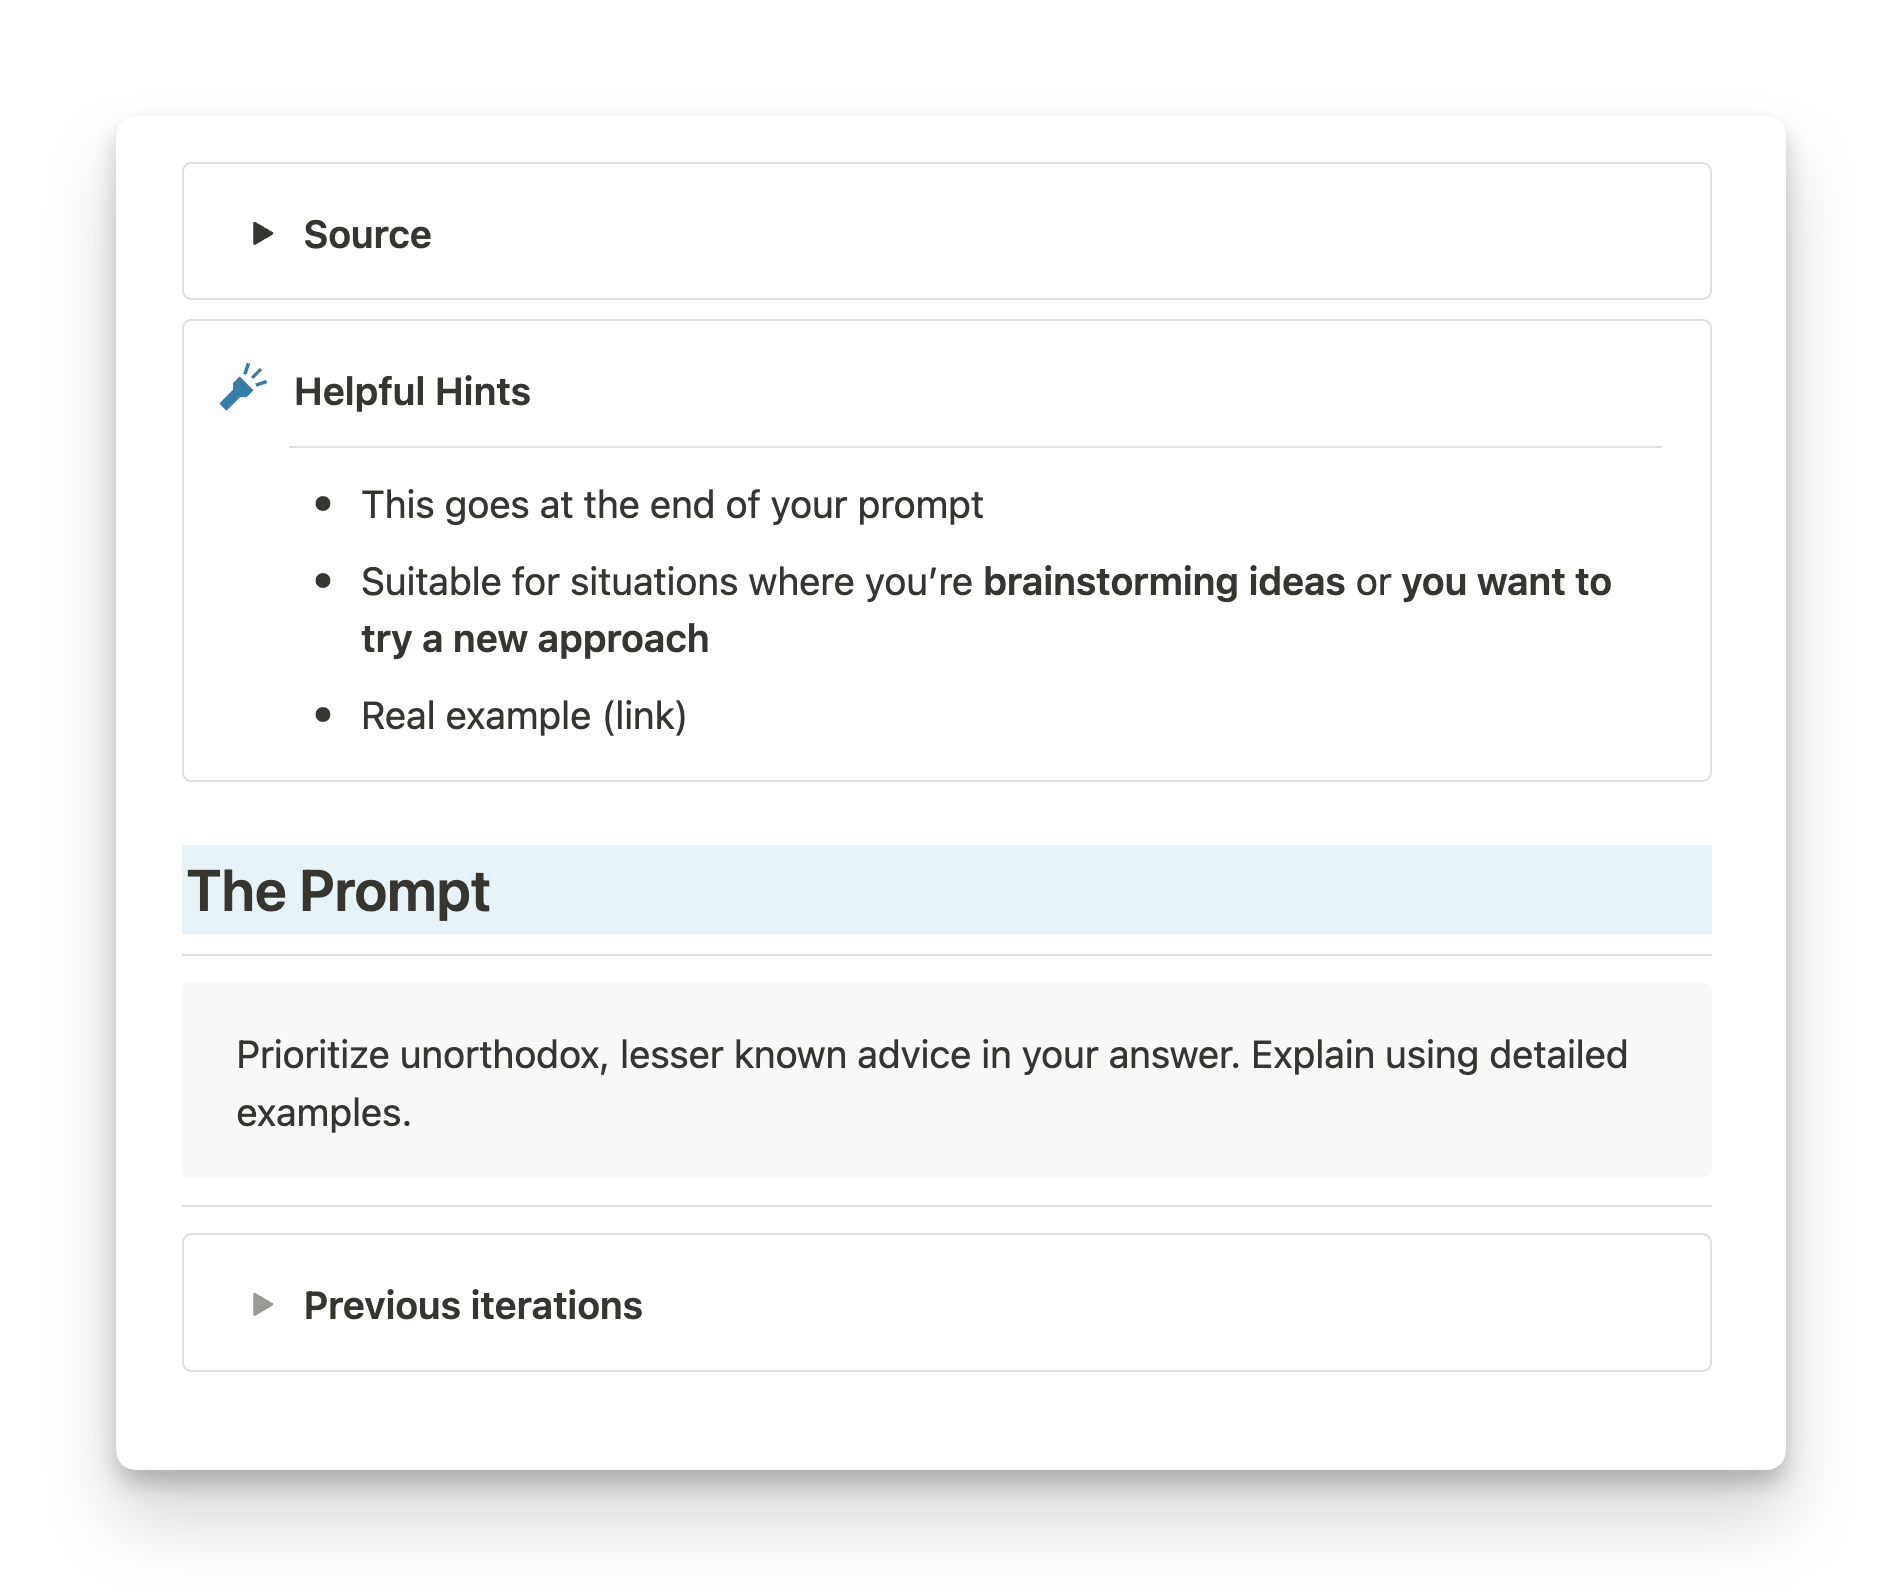
Processing During Weekly Reviews
During your weekly review:
Clean up the prompt by removing unnecessary notes
Test it on real scenarios
Add helpful hints based on your testing
Specify which AI app it works best with
Change the Type to the appropriate category (Personal, Business, etc.)
Make improvements to the original prompt if needed
Save previous iterations for reference
Pro Tips for Better Organization
Use code blocks (type "/code") to store prompts for easy copying
Or use callout boxes if you need visual differentiation for variable placeholders
Group similar prompts together on a single page to keep your database streamlined
Add the New Prompt button to frequently used pages for seamless capture
Use the search function to quickly find specific prompts
Final Thoughts
A well-organized prompts database is more than just a collection of text snippets—it's a system that enables you to leverage AI tools consistently and effectively. By reducing the friction of prompt creation and management, you'll develop a sustainable habit of using AI in your daily work, ultimately saving time and boosting your productivity.
The key is to start simple and evolve your system as you go. Begin by capturing prompts you find valuable, test them during regular review sessions, and organize them in a way that makes sense for your workflow. Over time, your database will become an invaluable resource that helps you keep up with AI advancements.
If You Enjoyed This
If you found this guide helpful, you might be interested watching in my AI Playlist next!