Get Started with Notion (without losing your mind)
Notion is a powerful tool, but it can be overwhelming if you're just starting out. In this blog post, I'll share a step-by-step tutorial for building a simple Notion dashboard that keeps your tasks and notes organized.
Watch it in action
Resources
- Make a copy of the template here
- Grab Notion Toolkit (for free)
Key Takeaways
- Databases form the foundation of effective Notion setups. Set them up first for organized tasks and notes.
- Dashboards bring it all together. Create a "Command Center" where you see your important info in one place.
- Templates save time. Take the hassle out of routine note-taking with pre-made formats.
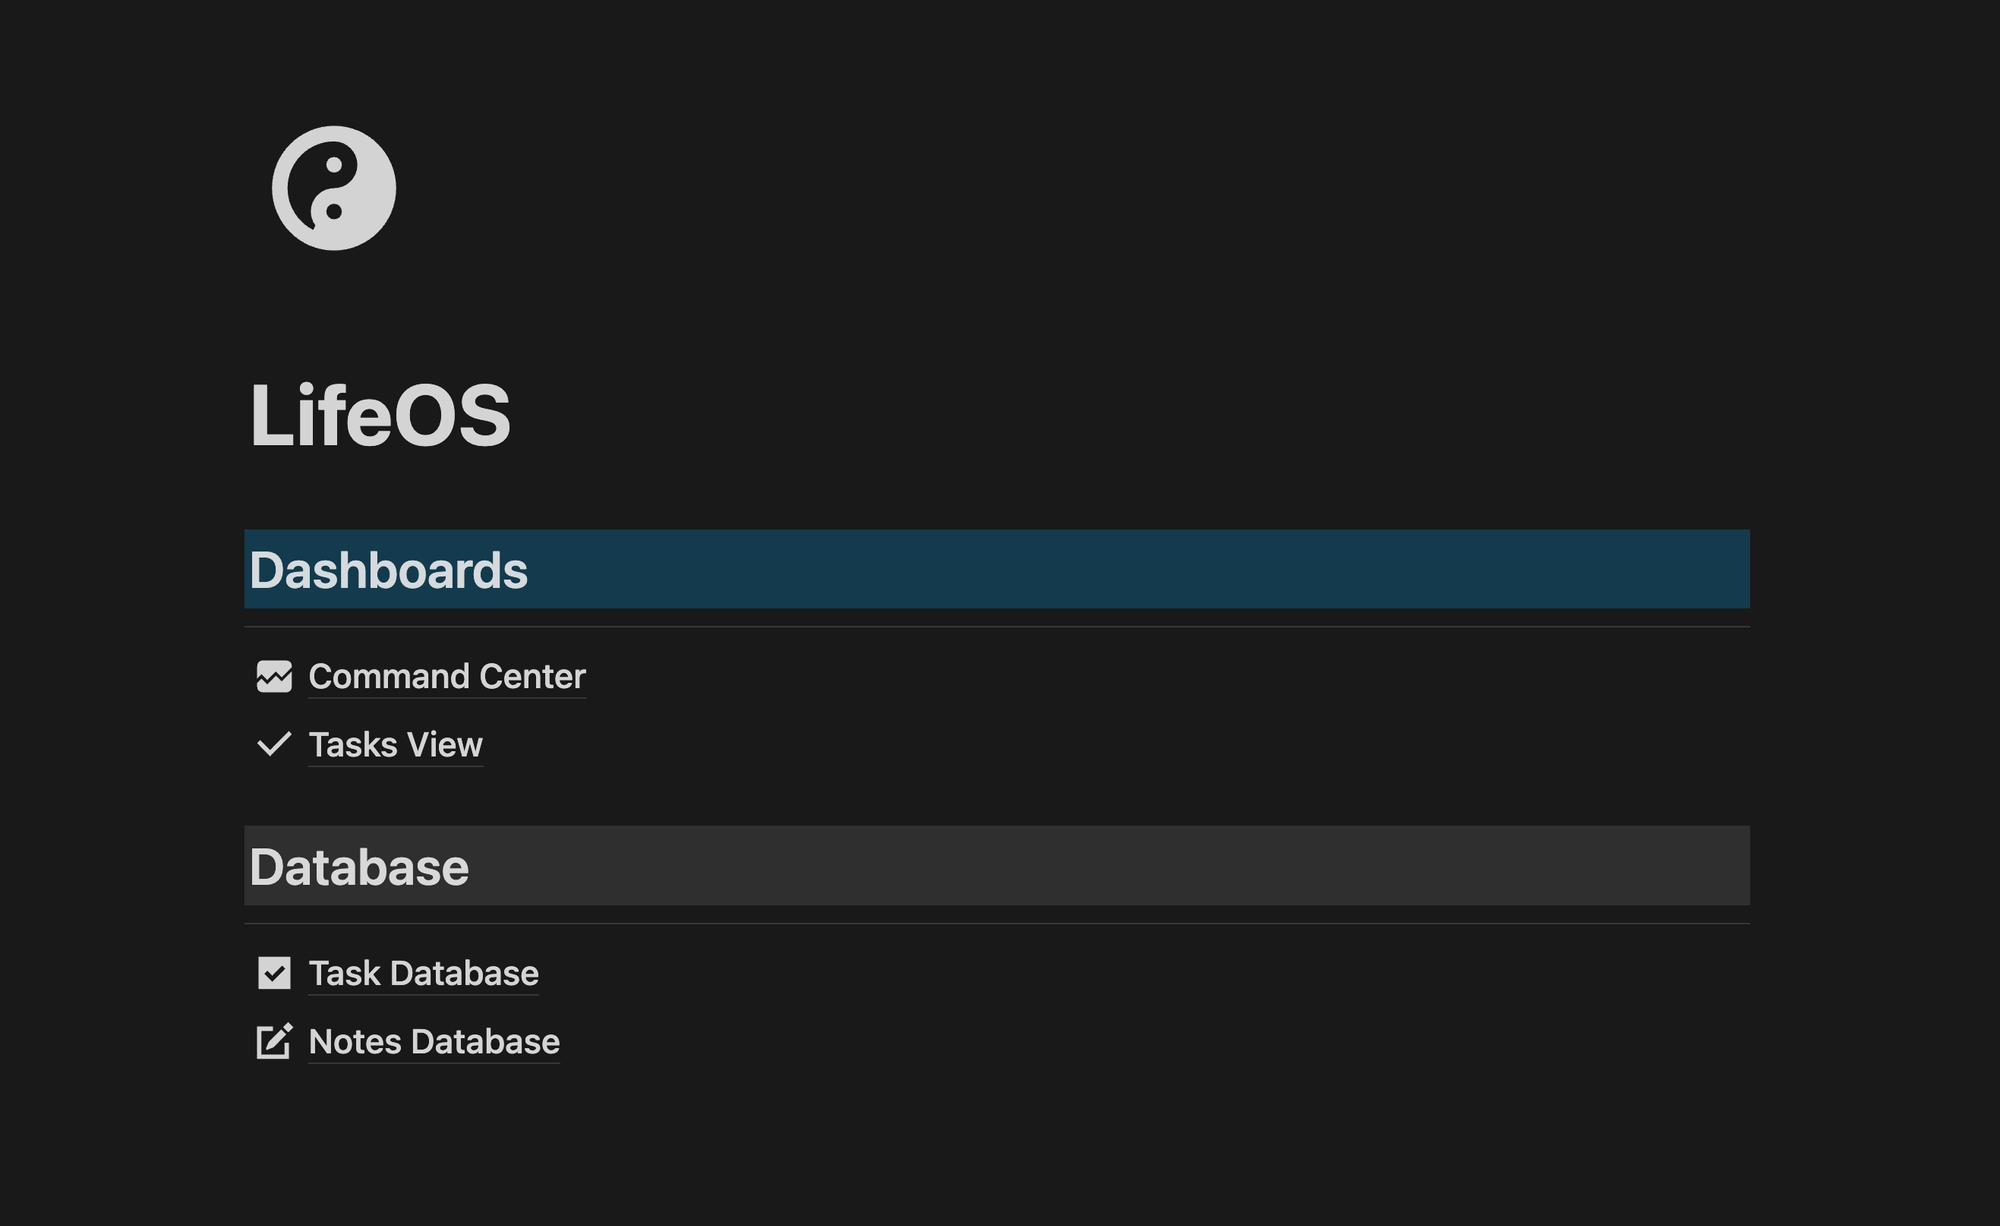
Step 1: The LifeOS Page
Start with a blank page titled "LifeOS". This will be your workspace's home base. Give it an icon and add sections: "Dashboards", "Views", and "Databases".
Step 2: Build Your Databases
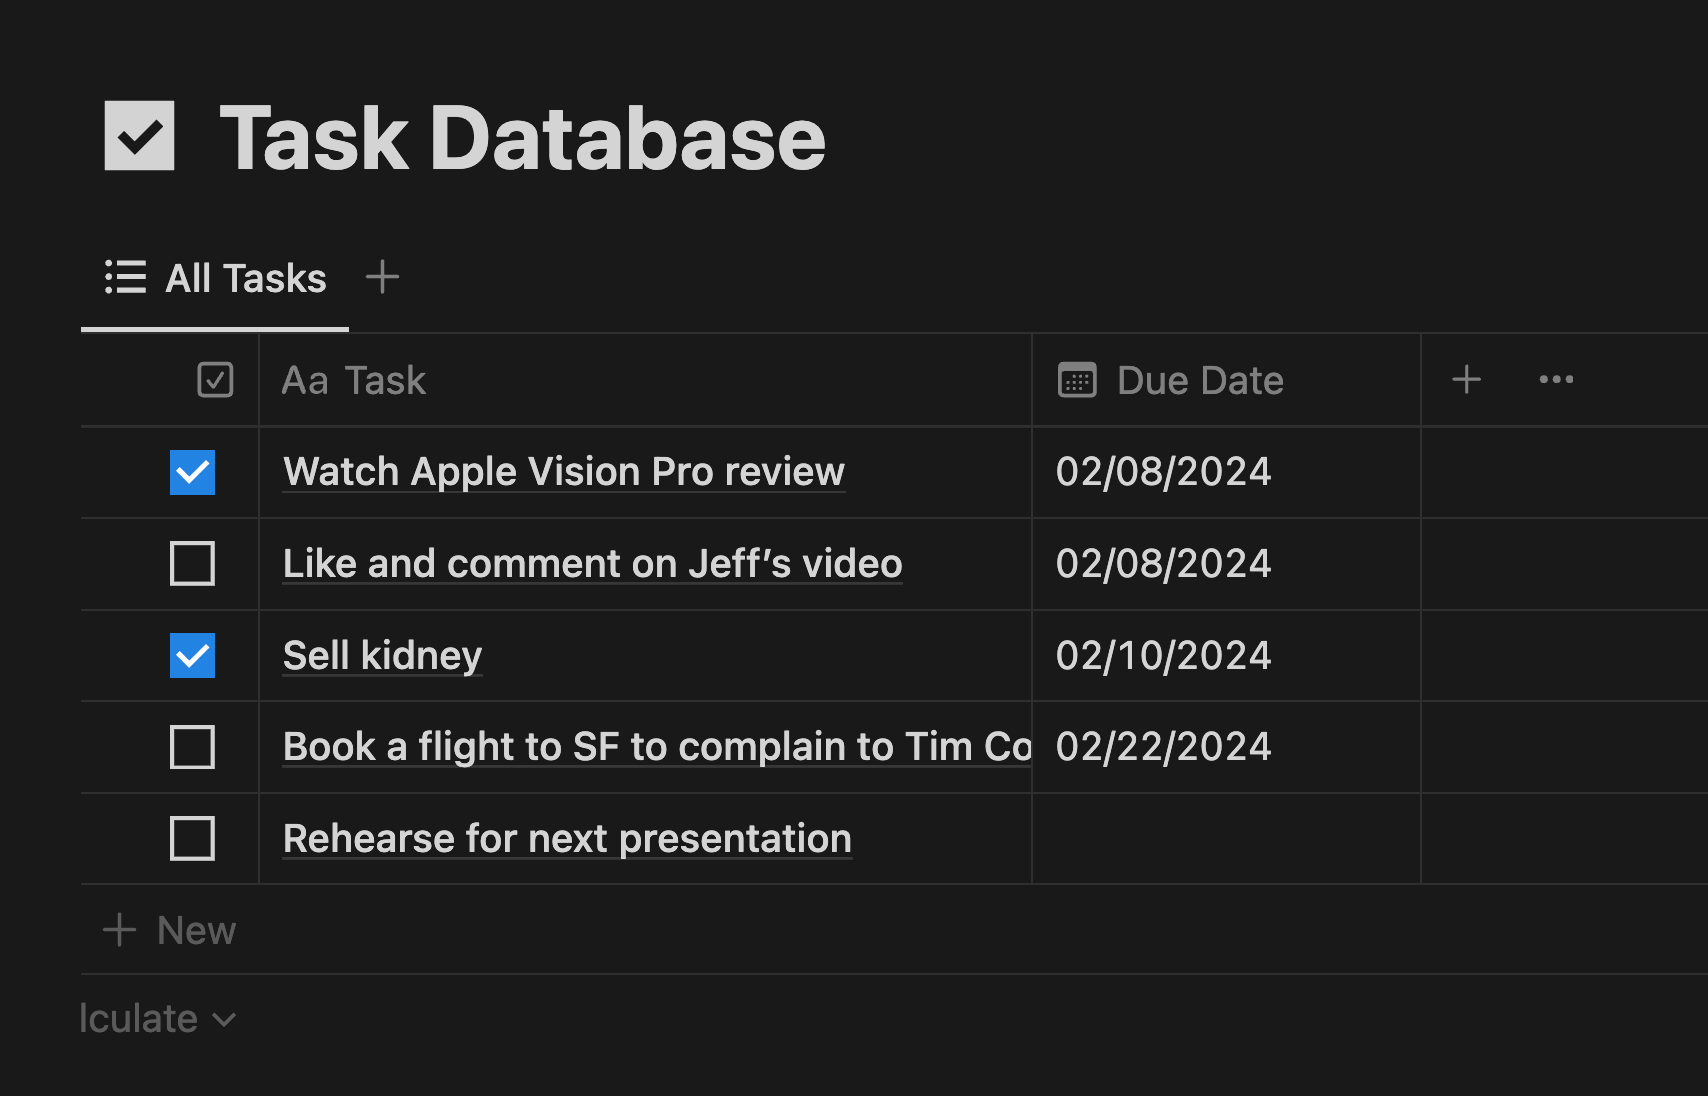
Tasks: Create a table database named "Tasks." Include properties for "Task", "Due Date", and "Done". Sort by "Due Date" for priority.
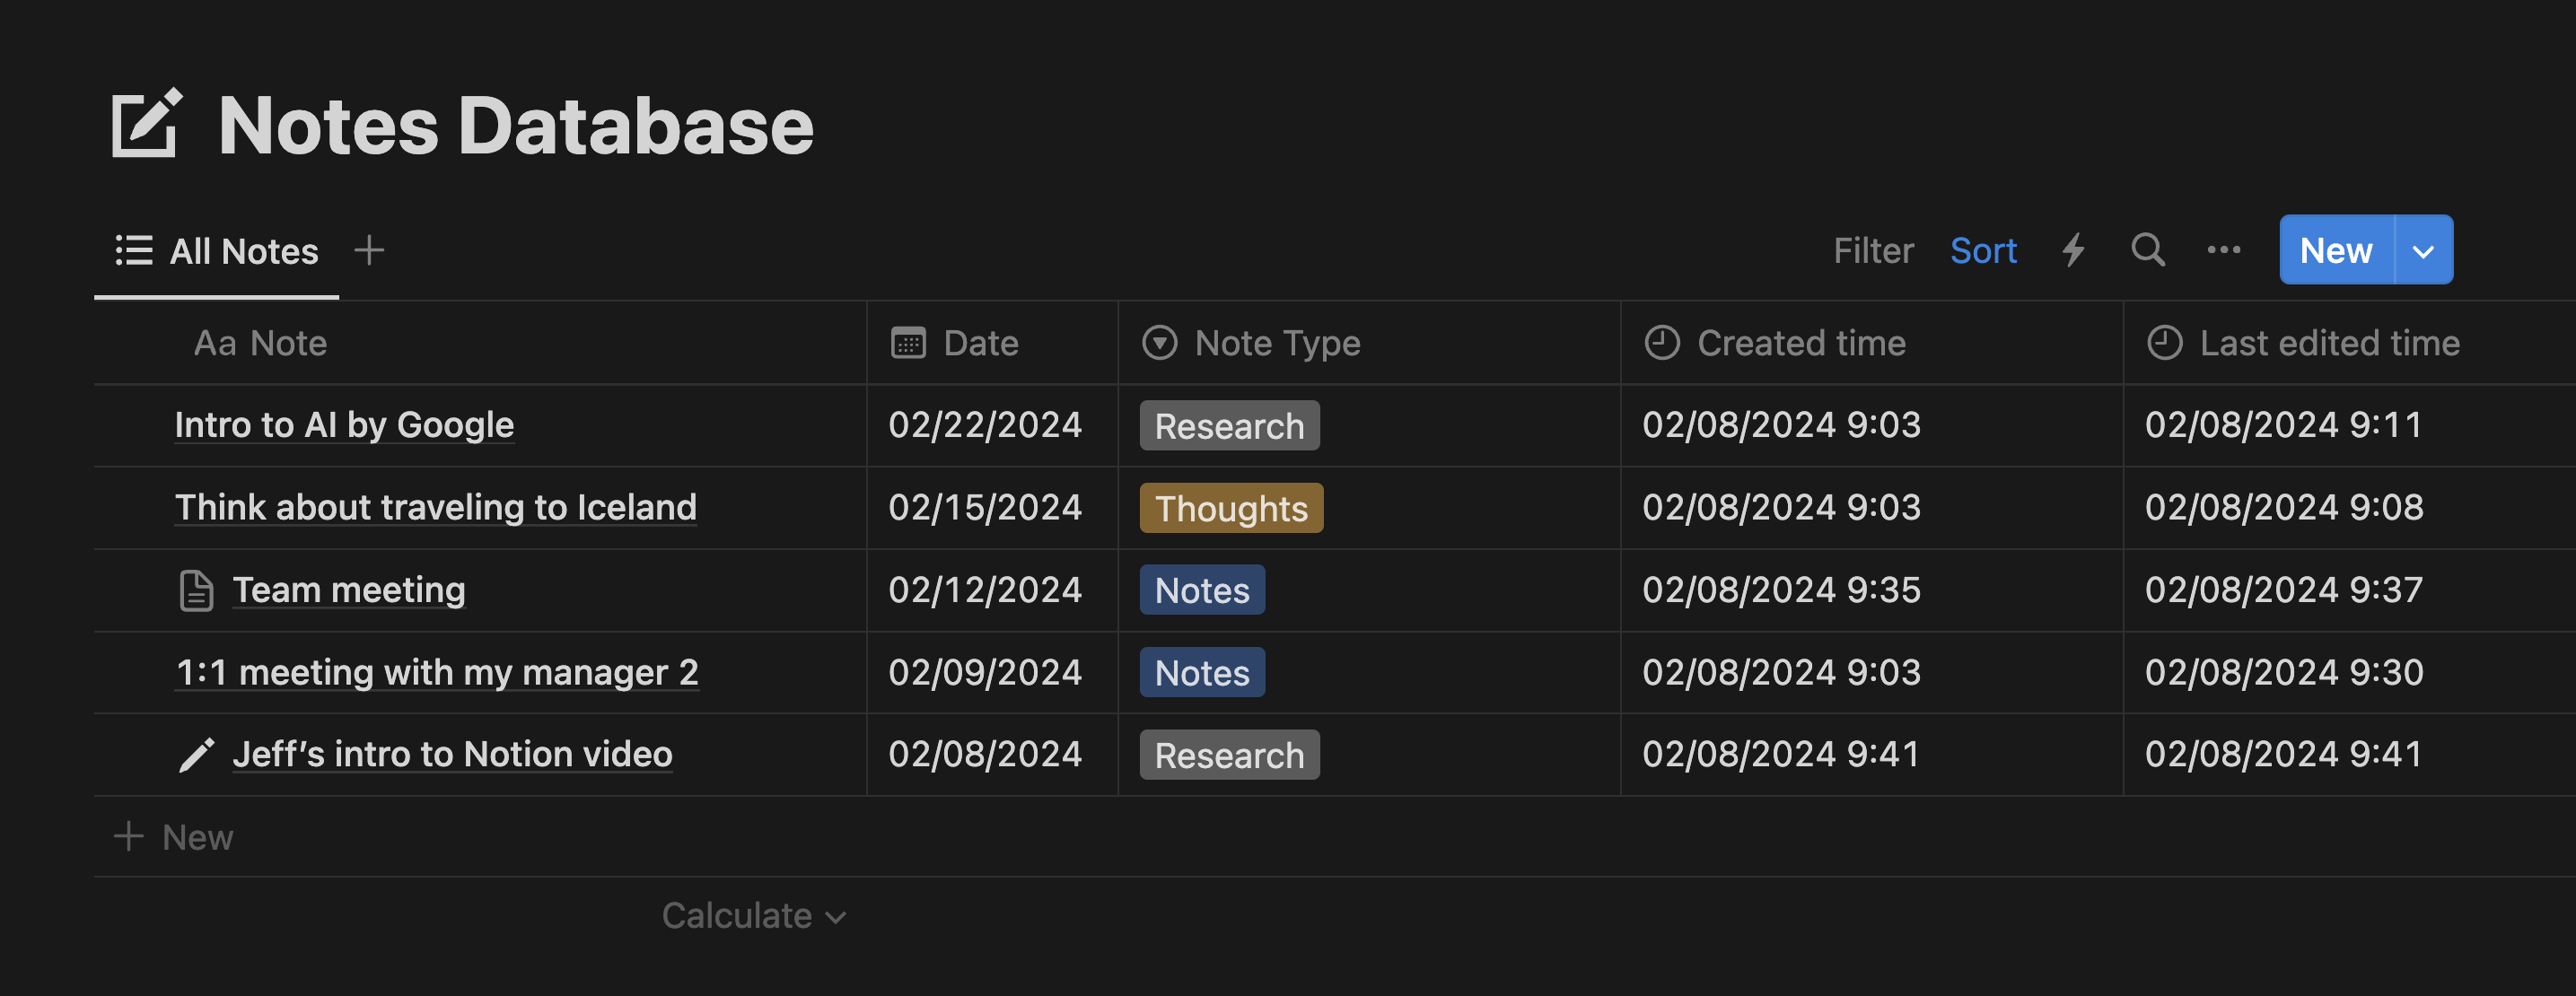
Notes: Create a "Notes" database with columns for "Note", "Date", "Type", "Created time", and "Updated time". Sort by "Updated time" to see your latest notes first.
Step 3: Your Command Center Dashboard
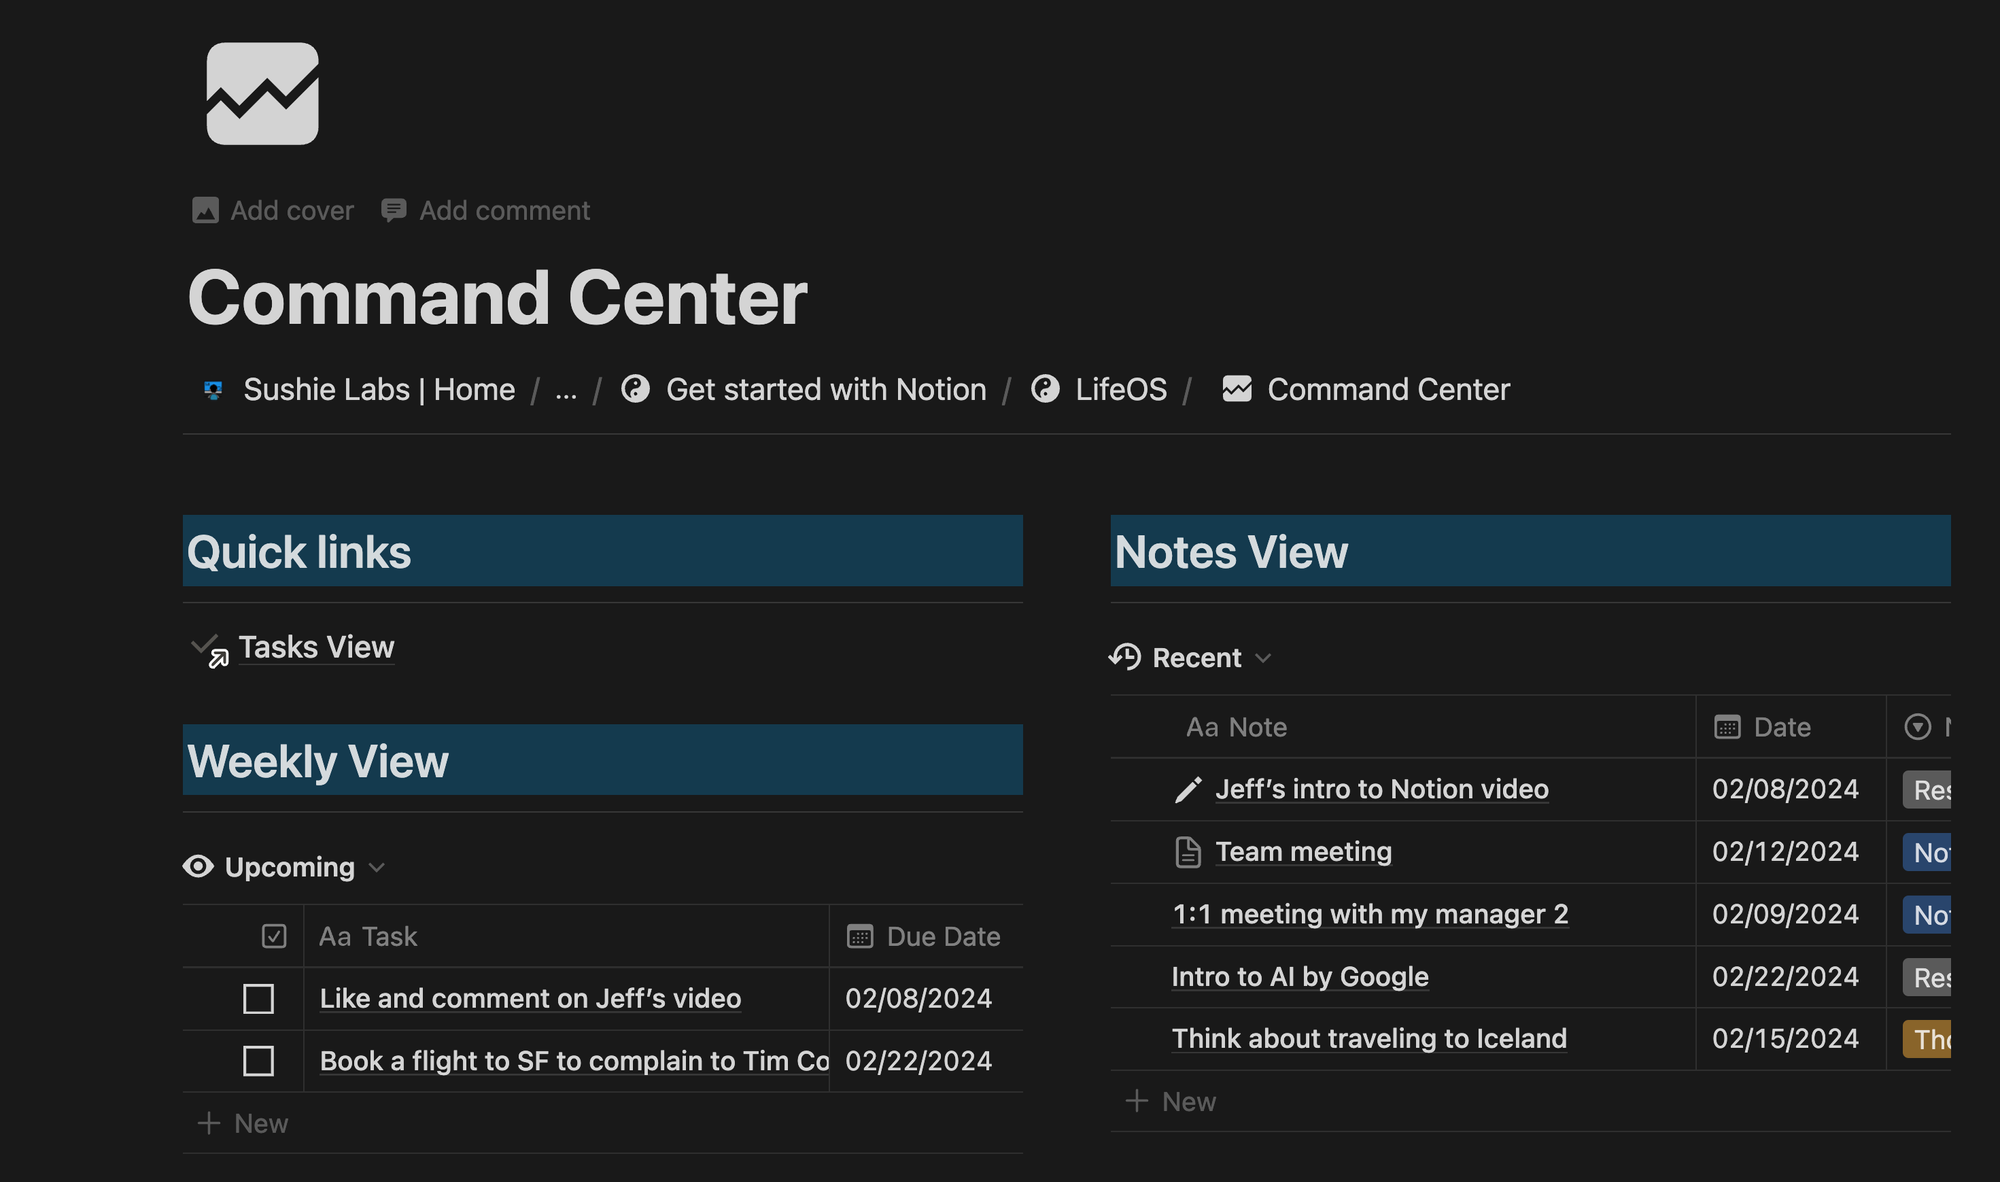
Create a page called "Command Center" – your productivity hub. Here's how to add task and note views:
- Duplicate your main "Tasks" view and filter for upcoming tasks, as well as those without due dates ("Inbox").
- Set up your "Notes" view for recent activity.
Step 4: Templates for Efficiency
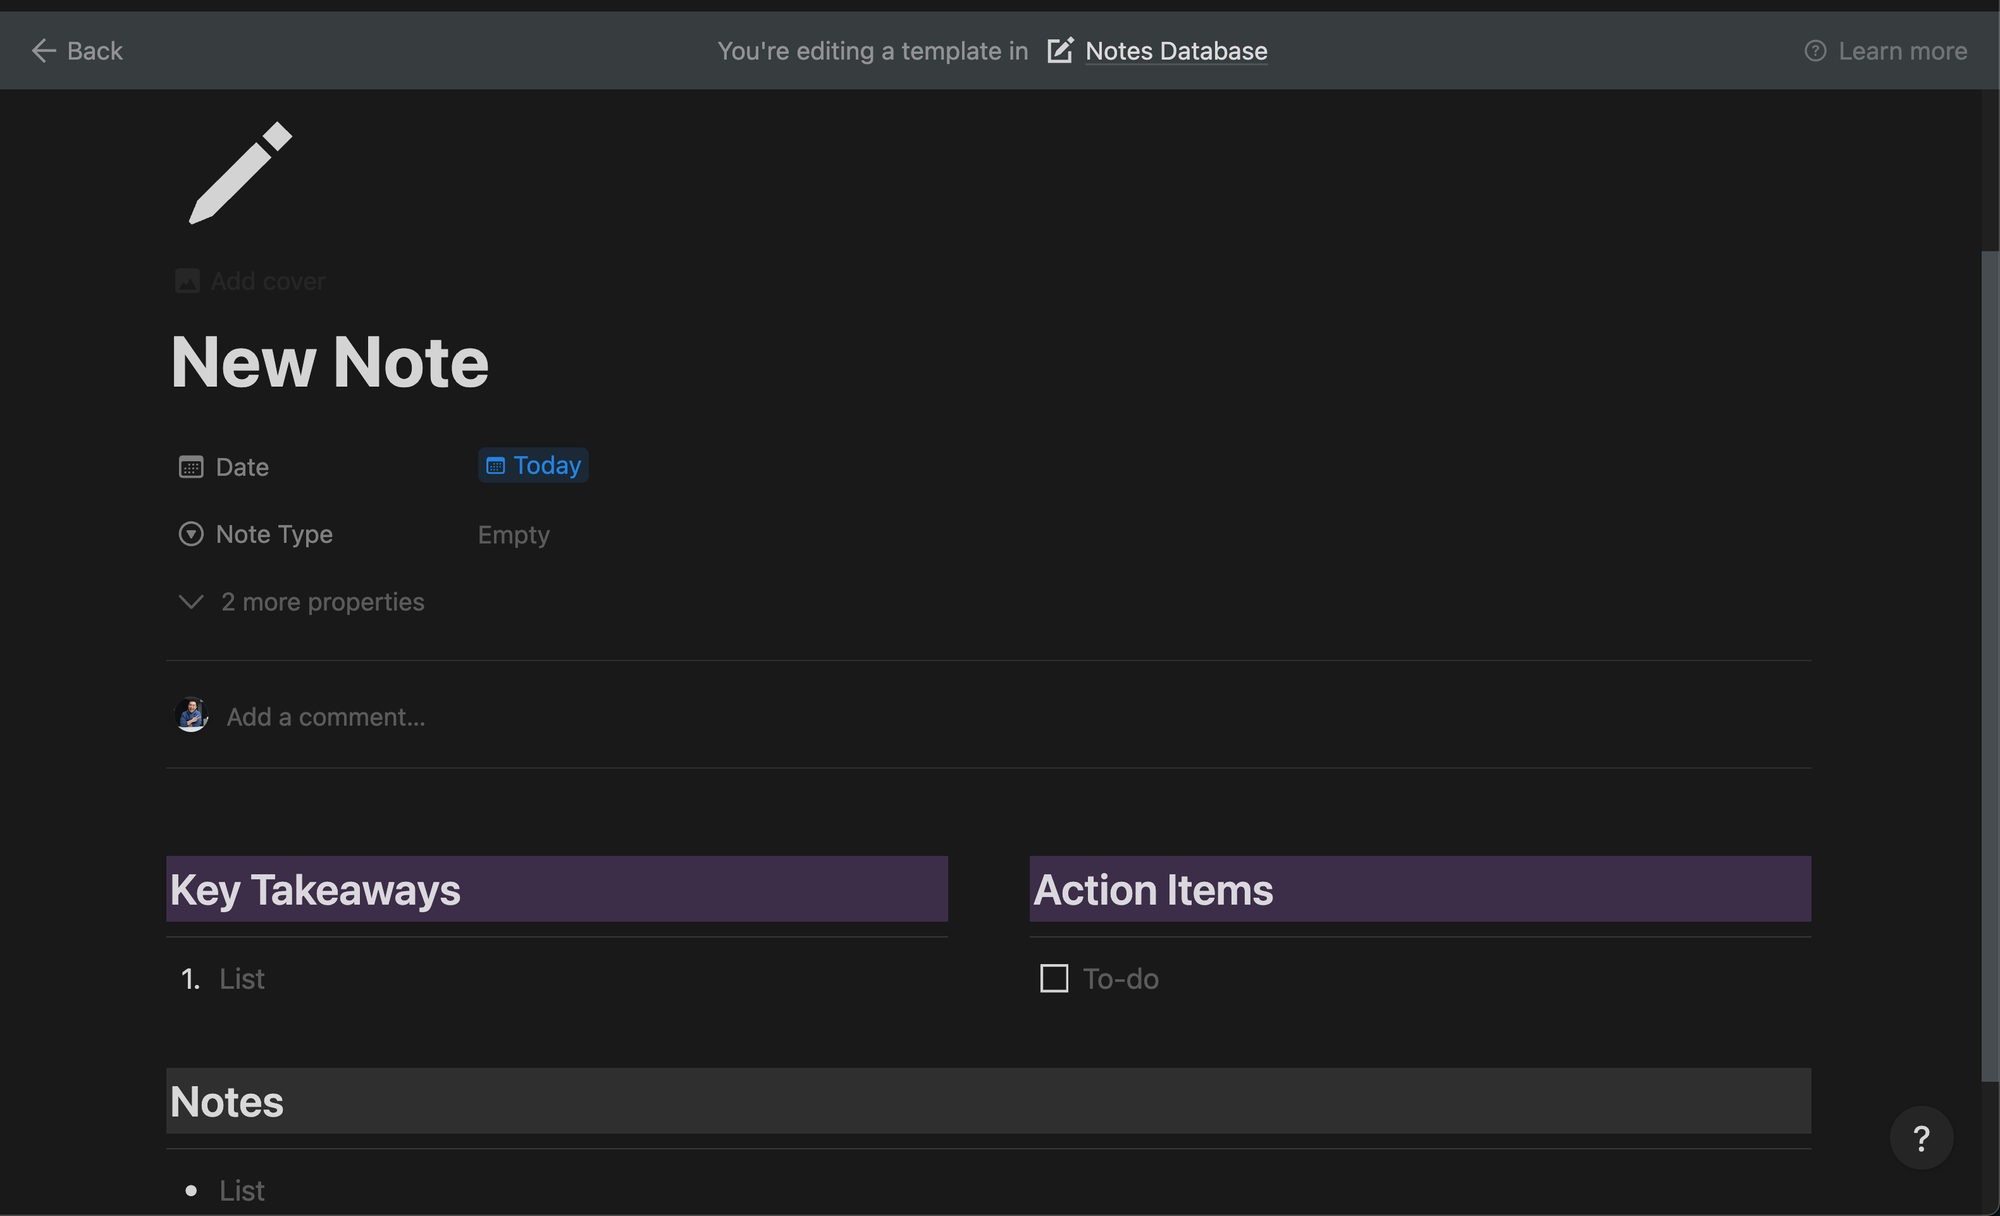
Create a "New Note Template" with pre-populated sections for:
- Date
- Key Takeaways
- Action Items
- Notes
Set this as your default for quick, structured note-taking.
Bonus Tip: The Task Calendar View
Create a page called "Task View" to visualize your tasks on a calendar. Select your task database, switch the layout to "calendar", and toggle the "Done?" property.
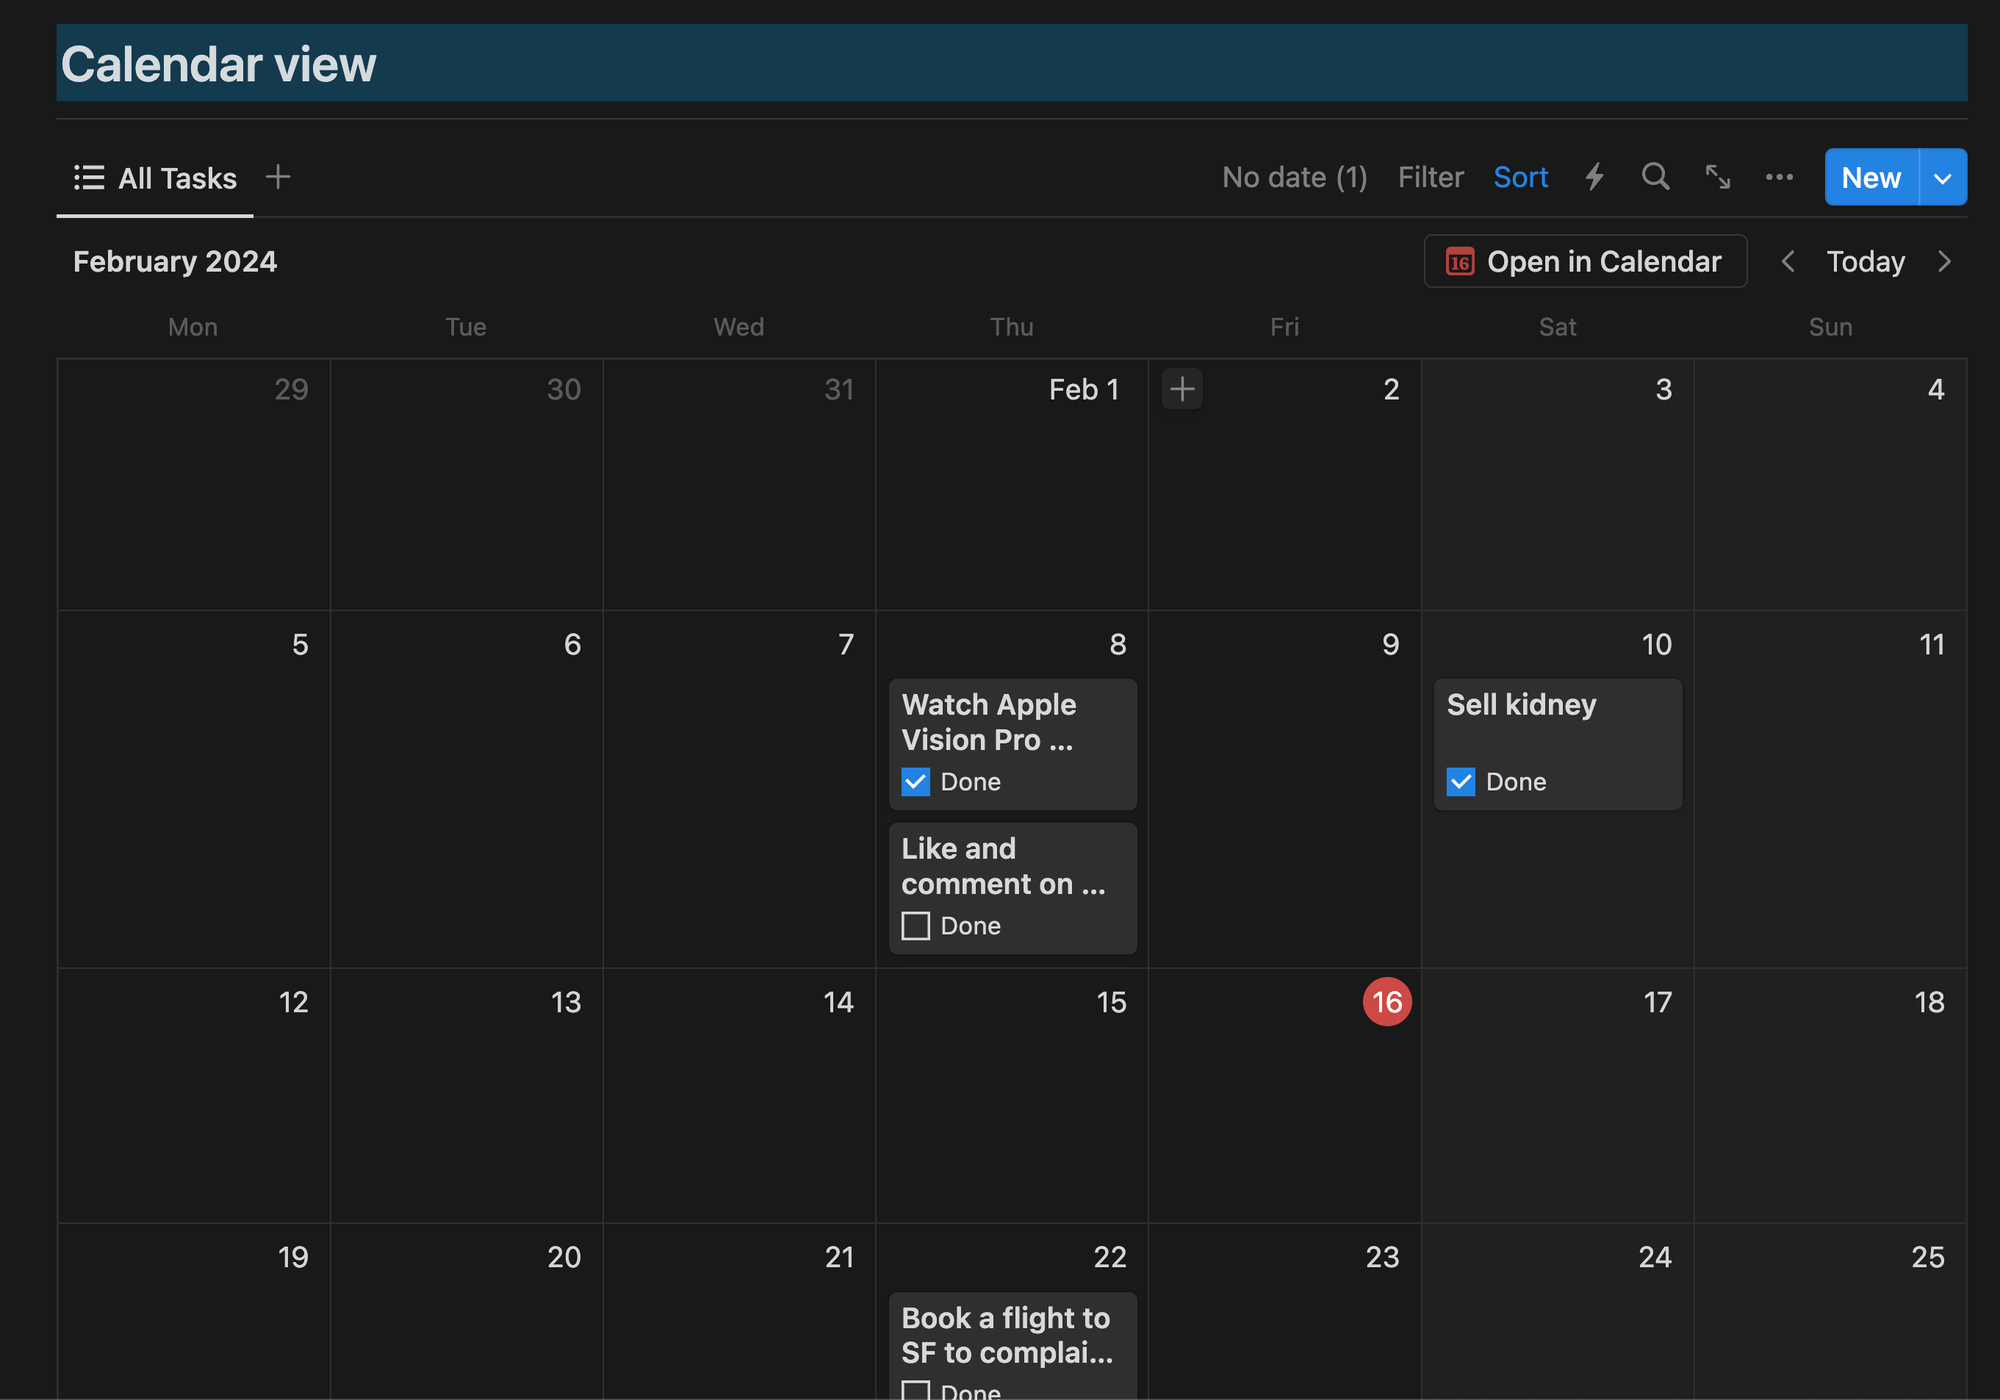
Notion's strength lies in its customizability. Experiment with more databases, views, and dashboards as you explore the features that work best for you.
If you enjoyed this
You probably want to check out how I plan my week in Notion!